on creativity

wheel.png

I grew up strongly believing that I was not an artistic person. Through grade school art class I came to understand, albeit falsely, that the creative kids were those who drew images of families that resembled something near to actual humans. Mine were lines connected to other lines with squiggles for hair. From this realization forward, I tried to avoid situations in which I had to physically make anything that might be judged on its pleasing or not-so-pleasing aesthetic. Some of this sidestepping almost certainly came from a fear of criticism, but it also came from entirely convincing myself that I did not enjoy making things. I’ve always liked to sing and took to cooking in late adolescence, but anything that my teenage brain classified as art? No, thank you. I wasn’t good at it and therefore I didn’t like it.

As I’ve grown older, I’ve become less firm in my self-classification as “uncreative”, though I still wouldn’t jump to the term “artistic” or any of its synonyms if asked for five words that describe me. I’ve also become vastly more willing to participate — and even to find enjoyment — in activities that I’m not immediately good at.

What might have been the last necessary push toward action in my years-long ruminations on creativity and my relationship with it was reading Elizabeth Gilbert’s Big Magic while I was in Hawai’i. I am a Gilbert fan (and not because of Eat, Pray, Love in case you were wondering; read her fiction and I think you will understand my fondness) and when her most recent title came out, despite my initial uncertainty on the topic and fear that it might be a bit too woo-woo for me, I picked it up at the airport. It’s been a number of months since I read Big Magic, but as I remember it, the mantra of the book is that each and every person alive is innately creative. It isn’t a trait that only a select few posses, but a function essential to the human spirit.

Gilbert writes, “Are you considering become a creative person? Too late, you already are one. To even call somebody “a creative person” is almost laughably redundant; creativity is the hallmark of our species. We have the sense for it; we have the curiosity for it; we have the opposable thumbs for it; we have the rhythm for it; we have the language and the excitement and the innate connection to divinity for it. If you’re alive, you’re a creative person. You and I and everyone you know are descended from tens of thousands of years of makers. Decorators, tinkerers, storytellers, dancers, explorers, fiddlers, drummers, builders, growers, problem-solvers, and embellishers–these are our common ancestors.”

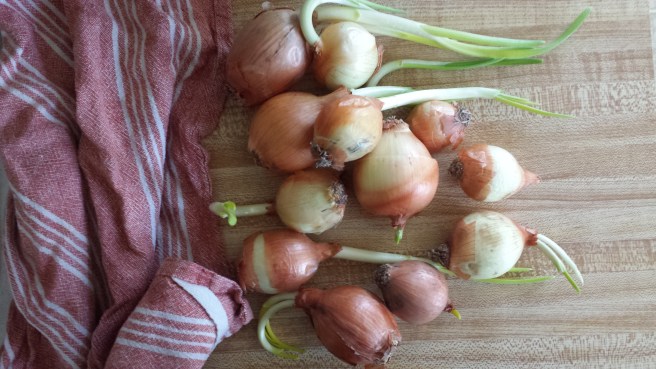
When I arrived back to the mainland in January, I started taking a pottery class. My first pieces weren’t anything to write home about, but I couldn’t believe how good it felt to have my hands around the clay. The class time was scheduled for an hour and a half each week, and I ended up purchasing an additional hour. The time felt sacred and meditative and it was so fun to be surrounded by others of all ages and skill levels who have chosen to prioritize creating. As the weeks passed, it came as a great surprise to me that I too was soon able to make things! This afternoon, as I dirtied my hands planting a succulent in a pot that I’d dirtied my hands throwing, I felt very thankful to have taken the leap into something that was — and still is — new and foreign. It is now so clear to me that each of us are makers, and what a powerful connection that is to share.

imagejpeg_0 (5)imagejpeg_0 (4)imagejpeg_0 (6)potimagejpeg_0 (2)

Advertisement

how to make yogurt

2016 has been my year of fermented foods. If you came to my house, you’d find bottles of kraut, kimchi, and kvass in the refrigerator. Brian has had a 3 gallon glass jar of kombucha brewing since January (in our bedroom, of all places.) I also enjoyed a loaf of bread from a sourdough starter living on a shelf in our kitchen until I accidentally forgot to feed it and it died. The point of all of this listing is just to say that there are so many happy bacteria living in my house! And after watching Cooked last month, I’ve become even more smitten with the idea of all the microbes moving in with me.

I made yogurt once a few years ago in a cooking class on milk fermentation. We also made beautiful stretchy mozzarella and I learned what rennet is. (Sorry if I just ruined cheese for you.) At a farmers market about a month ago, I was talking to the lovely Genesis of Full Hand Farm and she informed me that yogurt can be made very simply and with very little effort in a crockpot! This was news to me and the encouragement I needed to start exploring yogurt making on my own. Some of the biggest advantages of making yogurt at home include being able to adjust the tanginess to your liking (I like a super tangy yogurt) and to decrease the lactose content if you have trouble digesting dairy. Who knew that these things could be so easily controlled?! So, without further ado, some instructions:

20160328_154909(0)

  1. Acquire a half gallon of milk and two tbsp. of plain yogurt (these are the only ingredients.) The amount of milk you use will equal the amount of yogurt you make, so use a quart of milk and 1 tbsp. of yogurt if a half gallon seems like too much. Arguably the most important thing here (and one of the biggest reasons to make your own yogurt in the first place) is to select ingredients that you feel good about. For me, that means milk and starter yogurt produced by cows who live outside and eat grass and that are raised by a small dairy. If you’re in the Midwest like me, I’d suggest checking out Traderspoint Creamery whose products can be found in groceries throughout the region.
  2. Pour milk into your crockpot and turn to low/medium heat. Allow milk to warm for approximately 2 hours or until it reaches a temperature of 180F (you’ll need to use a thermometer to check this.) Once the milk gets to temperature, unplug the crockpot and allow the milk to cool to 120F.
  3. At 120F, stir yogurt into milk until it is fully incorporated. Put the lid back on the crockpot and cover with several bath towels. Leave the yogurt to ferment in a place where it will not be disturbed for at least 8 hours. If you want a tangier yogurt or to reduce the lactose content of the yogurt further (good thing to consider if you’re sensitive to dairy products) ferment for closer to 12 hours.
  4. After fermenting, place the crockpot of yogurt in the refrigerator for a few hours to make sure it is fully set.
  5. If you’d like to make a thicker yogurt, you can use a cheesecloth to strain off some of the liquid. I did not do this, but it is quite a straightforward process.

This entire process can also be done over the stove and in less time, but requires a bit more stirring and double-checking to ensure that the milk doesn’t scald.

20160328_155534.jpg

20160329_140556
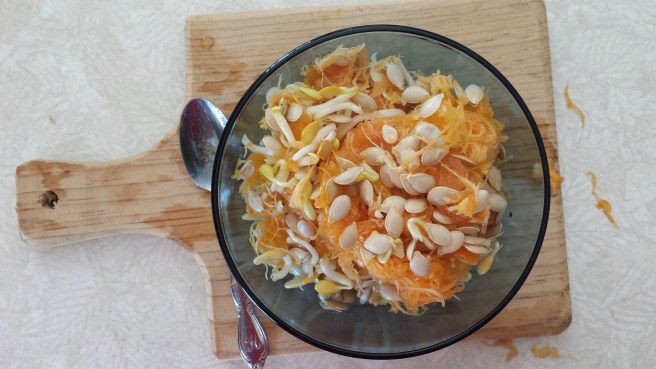
If you need some inspiration for what to do with all of the yogurt you just made, may I recommend a banana oatmeal smoothie? Throw all the below ingredients into a blender and blend to desired consistency. Quantities listed will make two generous servings.

ingredients:

  • two bananas (ideally frozen, but not a problem if they aren’t)
  • 1 c. milk of your choosing (I often use a nut milk)
  • 1 tbsp. maple syrup
  • 1 c. yogurt
  • 1/3 c. old fashioned oats/rolled whole oats
  • handful of ice cubes

20160408_110430

Now go get all of your friends together and eat some yogurt!

pulled pork sandwiches

If you haven’t heard of her already, Jenny Rosenstrach is a lady you should be aware of. Her blog and subsequent book, Dinner: A Love Story, were born of a dinner diary detailing what she’s eaten for dinner every night since 1998. Her recipes are excellent and varied and I perceive the center of her work to be that all relationships can be made stronger simply by sitting down with your people for a meal. YES! I agree wholeheartedly and love the authenticity of her voice and mission.

dals.png

Possibly the only thing I love more than the spirit behind her work are her Rut-Busting Pulled Pork Sandwiches. I made these sandwiches for the first time two years ago for one of Brian’s first visits with my parents. We were planning for a sunny summer afternoon meal and I told them I’d bring the main course if they handled side dishes, so we got a five pound pork shoulder from the farmers market. Since it was a pretty big guy, it took quite a long time to cook. I stupidly decided it would work well to put this thing in the oven just before we went to sleep so we were up every two hours the entire night checking on the pork roast. It felt like a preview of having a newborn baby and I would not suggest this method of preparation. Cook the roast on an afternoon when you know you’ll be home and  hanging around and then invite over a group of friends for dinner. That sounds to me like a much more enjoyable use of time, and everyone will be so impressed by your sandwich-making skills.

Original recipe here. I’ve adapted it slightly to make the sauce a bit thinner and more acidic. And I’m totally team pork shoulder. Also, this roast could certainly be made in the crockpot if that’s your thing — I assume the method there would be to throw everything in the pot (possibly halve amounts of thyme, salt, and pepper?) and let it cook for 6 – 8 hours on high or longer on low.

Before we get too far into this, shall we discuss pork shoulders? A pork shoulder is a pork’s shoulder is a pig’s shoulder. That is what it is! Sometimes butchers refer to shoulders as primal cuts, meaning they are one of the first pieces of meat separated from the animal during butchering. Typically, primal cuts carry a lower price tag than other cuts of meat since they don’t require as much intensity in carving. Pork shoulders are a hard working muscle on any piggy, so they should be cooked ‘low and slow’ to render them tender. The boston butt and picnic roast are both from the shoulder of a hog, though the picnic tends to have less fat and more connective tissue, meaning it may require a bit more cooking time than a boston butt. I find either type of shoulder roast to be a great fit for any meal you’re planning to cook for a long time on low heat.

20160329_122602.jpg

ingredients:

  • four pound pork shoulder roast (boston butt or picnic)
  • 2 tsp. dried thyme
  • 2 tsp. salt
  • 2 tsp. black pepper
  • 3 tbsp. olive oil
  • 1 large onion, diced (or in my case, 6 small ones)
  • 2 cloves garlic, minced
  • 1 1/2 c. barbecue sauce (I used this one from my local organic grocery, but making it yourself would be fabulous, too. Jenny has a recipe on p. 238 of her book which I’ve never tried to make because I never have bourbon which is one of the ingredients, but it sounds really tasty.)
  • 1 c. apple cider vinegar
  • 3 dried chiles (Jenny recommends guajillo chiles or a few drops of hot sauce as a replacment, I used ancho chiles. Use whatever you can get your hands on!)
  • 2 bay leaves

directions:

Preheat oven to 325F. Mix together thyme, salt, and pepper in a small bowl. Rub a thawed pork shoulder all over with the seasoning to coat.

On the stove, warm a dutch oven or other heavy pot that can go in the oven to medium heat and add olive oil. Cook seasoning-coated pork shoulder in oil for 5 – 7 minutes on all sides and remove pork shoulder from pot.

Add diced onion and minced garlic to the pot and cook until onions are translucent. Add barbecue sauce, apple cider vinegar, bay leaves, and chiles. Bring to a boil. Add pork roast back to pot and ensure that the liquid comes at least 1/3 of the way up the roast. If it doesn’t, add some additional water and mix to combine.

Transfer the pot to the oven and cover with a lid left slightly ajar. Cook for approximately 6 hours, flipping the roast once every hour. Roast is done when it can be easily pulled apart with a fork. Shred the meat and mix with sauce. Make sure to remove chiles and bay leaves.

20160329_124428(0)20160329_13063520160329_130740(0)

I wanted to make brioche buns to use for these sandwiches. I mixed and kneaded the dough using a sourdough starter I’ve recently been feeding and it turned out beautifully —carmel-y and thick and warm and firm. Never have a seen a more perfect dough ball. Alas, it was a total flop in terms of timing and never made it from gorgeous and perfect ball of dough into the oven to become bread. Really really sad thing throwing that away after its fifth day in the fridge. Anyway, the pulled pork ended up on toasted semolina buns with melted sharp cheddar cheese, a fried egg, and mixed greens. Not complaining.

20160404_175003.jpg


vegetable soup

Part of the magic and trouble of eating real food is that real foods rots. Greens wilt and veggies that were once firm soften. All things that come from the earth yearn to return to it and often move in that direction sooner than some of us might wish they did.

So, what you, the home cook, must have are a number of devices in your emergency culinary toolbox (let’s call them screwdrivers for fun) that move products from the inside of your refrigerator to the inside of your stomach. I think meals of this nature work best when they are less recipe and more general instruction, so that’s what you’ll find here. No running to the grocery to pick up that one item you don’t have to make this type of dishes. If it’s not in your fridge, cabinet, or on your counter, it doesn’t belong in a screwdriver meal.

In my personal “oh shit everything I bought at the farmers market is about to mold” toolbox you will find a how-to for a basic stir-fry, a vegetable-heavy pasta sauce, and a greens-and-tomato-laden fritatta. But in these first weeks of spring, I consider vegetable soup the best possible way to clean out any fridge. Here’s what to do:

20160328_13025820160329_124804.jpg

  1. Round up all the produce and other items in your kitchen that are about to go off or that you need to move along to make room for your upcoming shopping trip. This time, for me, that search included some many-eyed potatoes, frozen bags of last summer’s green beans, partial jars of beef and chicken stock, and some extremely limp carrots.
  2. Evaluate your stash and add in some other ingredients to round it out. Do you have any onions, celery, carrots, or garlic? Those foods are an ideal starting place for just about any soup. What about a jar of tomatoes (whole/diced/crushed will all work beautifully)? A partial bag of frozen peas or corn leftover from a casserole you made a few months ago? What’s your dried herb situation? Pull out some parsley and oregano along with salt and pepper, if you have it.
  3. Splash a few glugs of olive oil into the bottom of a stock pot or dutch oven and allow it to warm. Dice an onion or two and throw them into the bottom of the pot. Gently stir and allow the onions to turn translucent. Add chopped carrots, celery, and garlic, if you have them. If you don’t have them, do not panic; move to the next step. (Whenever I cut up carrots, celery, or onions, I keep the peelings in a big jar or bag in the freezer for future use in making stock. Image of my peelings below.)
  4. Chop and add to the pot whatever other vegetables you have selected. Things that would work well here include root vegetables (sweet or white potatoes, turnips, parsnips), cubed squash of just about any variety, beans or peas, cabbage or other greens, corn, canned/frozen/fresh tomatoes, or peppers. Honestly I don’t think you can go wrong here with maybe a few exceptions — possibly artichokes, olives, and asparagus would not be good. But by all means, please go ahead and prove me wrong on that one.
  5. Once all your vegetables are in the pot, cover them with stock or broth or water. Bring to a boil and allow to simmer until all the vegetables are tender and flavors are combined. I left my pot on the stove simmering for a least an hour because it was a chilly and rainy Monday and it made me feel better, but it was certainly ready to eat well before then. If you are an insane person like me, you will end up with nine quart jars of soup and will be ready for visitors, natural disasters, and nuclear war.

20160328_141431

20160329_140838.jpg

chana masala, cooking dried beans

The small town where I grew up does not have much going for itself in the way of authentic international food. There is a Mexican restaurant — I’m pretty sure these come standard in all little Midwestern towns — where you can purchase tacos or enchiladas served alongside cold liquid-y salsa. There are several Chinese restaurants, one a buffet, where dishes that are intended to be delicate and vegetable-forward are meat-centric and coated in sticky sauces that pool with oil and leave the consumer with a stomach ache. As a child, and even today, there are several dishes from these non-authentic restaurants that I quite like. They just aren’t the real thing. And as my travels and eating habits have expanded, I want the real thing. Or at least something close to it.

My childhood haven for authentically prepared cuisine from a culture that was foreign to me (a very specific type of haven, I know) came in the form of my dear childhood friend’s home. My friend is a first generation Indian American and her mother is a culinary master. She prepares beautiful meals for her family that left me, a kid who hadn’t eaten much outside of salt and pepper in the spice-department, nothing short of salivating. She keeps her kitchen fully stocked with bins of dried goods, spices, vegetables, and pastes ready to be crafted into brightly colored dishes that are as intoxicating to the eyes as they were to my stomach. Tuesday and I spent many afternoons watching TV or doing schoolwork at this friend’s home. Shortly after arriving, we’d often pull a big container of salsa, one of her mom’s specialties, out of the refrigerator. The salsa was so spicy to our underdeveloped taste buds that Tuesday and I kept a gallon of milk and two cups on hand while we munched on tortilla chips overflowing with the hot sauce. I remember having to run to the bathroom for tissues to wipe my nose and eyes. These flavors were completely new to me and unbelievably enticing. Visiting this home for dinner was a treat and culinary adventure; I simply couldn’t believe my mouth.

20160320_110252

Now, let’s talk about dried beans and legumes. I know that they are somewhat intimidating, and Tuesday made a special request for instructions on how to prepare them. Let me first say: It’s incredibly easy and rewarding and you get a whole lot more bean for your buck! The following directions are specifically for chickpeas—also called garbonzo beans — but the process for cooking all beans and lentils is relatively similar. The main difference is in the cooking time and Google is pretty handy for figuring that one out. Here’s what to do:

Purchase chickpeas either from the bulk section of your grocery if they have one (you can bring your own container to fill up or use the plastic bags that are typically provided) or find them pre-packaged in 1 lb. containers near the canned vegetables. Once the chickpeas are home, rinse them in a colander and pick out anything that isn’t food; you may come across a stone or small bit of a twig. After you’ve sorted and rinsed the chickpeas, put them in a bowl and cover with several inches of water. The beans will expand as they soak, so be sure to allow enough excess to keep them underwater as they grow. Cover bowl with a towl and leave on the counter overnight.

The next day, re-rinse the chickpeas in a colander. Pick out any funny stuff that may have been missed during the first inspection. Dump the chickpeas into a large pot and pour water over top, approximately 3 cups of water per 1 cup of beans. Bring the water to a boil and continue cooking for 60 – 90 minutes to desired softness. When finished, scoop off any chickpea parts that have risen to the surface of the water and drain. Done!

20160322_104346(0).jpg

Back to the main event. This recipe for chana masala is adapted from Smitten Kitchen who adapted her recipe from this guy who adapted his from Madhur Jaffrey. And though I’d never claim that this dish is the real thing, it’s a pretty damn good imitation.

ingredients:

  • 1 tbsp. canola oil
  • 2 medium onions, diced
  • 3 cloves garlic, minced
  • 1 in chunk of ginger, grated (I keep ginger frozen in a piece of parchment paper and cut off and grate a chunk when I need it; best way I’ve come upon to store it)
  • 1 tbsp. ground coriander
  • 4 tsp. ground cumin
  • 1/2 tsp. ground cayenne pepper
  • 1 tsp. ground turmeric
  • 2 tsp. ground paprika
  • 1 tsp. garam masala
  • 1 28 oz. can diced tomatoes
  • 2/3 c. water
  • 4 c. cooked chickpeas (2 15 oz. cans will also work)
  • 1/2 tsp. salt
  • juice of one lemon

directions:

In a large pan over medium heat, warm canola oil and add onions, garlic, and ginger. While the onion/garlic/ginger mixture cooks, measure out spices and mix them in a small container. Add spices to pan and lower heat slightly. Stir to coat onions with spices and allow to cook for a few minutes. Stir in jar of tomatoes with juices, water, and chickpeas. Simmer for 15 minutes and add salt and lemon juice. Serve immediately on its own or over rice, or continue simmering to allow flavors to further combine.

20160322_12340520160322_123516(1)20160322_12390620160322_142336

Pro tip: This stuff is also pretty good on tortilla chips with a scoop of sour cream. Talk about inauthentic!


cooked

“surrounded as we are by fast food culture and processed foods, cooking our own meals is the single best thing we can do to take charge of our health and well being.” – MP

Let’s take a break from our regularly scheduled programming to talk about the incredible production I spent hours enamored by last Sunday: The new Netflix series Cooked by author/teacher/activist and all around brilliant man, Michael Pollan. Some may have read his words in The Omnivore’s Dilemma, Food Rules, The Botany of Desire, or another of his intriguing and educational books (maybe even Cooked, the one this series grew from.) If you’ve done so, you’re probably already sold on how great this guy is and how smartly he communicates his ideas. If you’ve never heard of him, make this show your introduction.


The program is split into four episodes, and each episode covers one natural element: Fire, water, air, and earth. Below are some tidbits from each.

Fire features a pitmaster in the Southern US and aborigines in Western Australia who continue to hunt wild game. It will give you a new understanding and appreciation for human heritage, the original diet, and beautiful pigs.

Water delves into the ways in which climate change is impacting farmers and food production in India. It also explains how completely the act of cooking is chemistry, in both the home kitchen and the food processing facilities around the world which so many of us are increasingly eating from.

Have you ever heard the aphorism, “Man cannot live on bread alone?” Air, will give you all the details as to why that addage is false. You’ll also learn that the way we make bread in the U.S. is so spooky and that we should all start making our own. Needless to say, I began my sourdough starter on Monday.

Earth features an Abbey in Connecticut that I had the opportunity to visit a few years ago where they still make raw milk cheese out of a wooden vat. Not only is this methodology preserving a cultural tradition, it has created a surprising relationship with E. coli. Also, those dairy cows are called Dutch Belted and they are a critically rare breed in the U.S. and I want all of them!

I was feeling a lot of feelings while watching this show. I laughed, I had to blink a lot at certain moments to avoid tears, I considered that maybe I should procreate so that I could explain all of this information to my child, I was hungry, I was amazed that the human race hasn’t gone extinct, and my mind was BLOWN by just how much I still have to learn about food and nutrition, even after studying it at some length and feeling relatively confident about my knowledge of the subject. If you’re interested in food or cooking or food systems, care about what you put into your body or what your body does with it once you put it in there, or if you like looking at farmers and cooks, beautiful cinematography, or watching people enjoy the heck out of the things that they are doing, this is your new weekend plan.

If you don’t have a Netflix account, sign up for a free months trial (that’s what I did!) — just remember to cancel it before the 30 days end if you don’t want to continue your membership.

(I imagine this is obvious to anyone reading this, but neither Netflix nor Michael Pollan is in any way affiliated with my endorsement of this show and I’m certainly not being compensated for doing it. I just really really liked it and I think that you will too!)

squash and democracy

I voted today! Just got done and have my sticker to prove it. YAY! You know what tastes really great with a side of democracy? I don’t think you’re going to guess this so I’ll just tell you: The answer is squash.

Why, you may ask, does squash go so well with representative government? Here’s why: Squash, like voting, is a humble and not particularly exciting thing. People take squash for granted. They leave it in the corner and forget to use it and now, a year later, the squash is still sitting around in that same dusty nook. But lucky day! Squash, while not particularly gorgeous or exciting, is hardy. It sticks around for the long haul and if you don’t use it when you thought you might, there’s always next time. (Is this too far a stretch? Are you still following?) Furthermore, squash, like voting, comes in all shapes and sizes! You’ve got your butternuts, and spaghettis, and acorns, and kabochas. Similarly, there is election day voting, early voting, or absentee ballots. Pick your poison and go do the damn thing because if the squash rots, it’s on you, my friend. (Still following? Quite possibly not by this point, so we’ll just move right along…)

20160308_105714

Squash! You can find this stuff in countless varieties at farmers markets throughout the winter and it can be stored for an absurdly long time in the right conditions (maybe not a full year, but at least for a couple of month.) There are so many methods by which squash can be cooked and eaten. It makes a great pasta, can be eaten on its own, can be mashed, made into soup, roasted, etc. Per pound, they are very economical and if you can learn to embrace the process of breaking them down, there’s nothing to dislike about a good old squash.

I asked Tuesday last week if she had any recipe requests, and she mentioned that she’d been hoarding squash. To help her begin to get through that reserve and to add extra A, B, and C vitamins to her diet, here are two easy recipes that together use up all the parts of whatever squash you may also be hoarding. Just about any type of squash will work for these recipes, so give whatever you can get your hands on a go.

stuffed squash ingredients:

  • 2 small squashes (something grapefruit sized is good)
  • 1/2 lb turkey sausage links
  • small onion
  • handful of mushrooms (I used blue oysters)
  • two big handfuls of spinach or kale
  • 1/2 c kamut
  • 1/8 c shredded parmesan cheese
  • salt and pepper, to taste

This is a super flexible basic recipe which can be thought of as a model for making your own squash filling. Use a different protein, or none at all. Add variety in the vegetable department. Use brown rice or millet or quinoa or another grain in place of kamut. Whatever you choose to do, these amounts should provide a helpful guideline. Also, I was able to find all of these ingredients minus the salt, pepper, and kamut from Indiana farms.

Soak kamut in a pot of water overnight. The next day, drain kamut and refill the pot with fresh water. Bring to a boil and add kamut and a pinch of salt. Cook for 30 minutes. When done, drain kamut and set aside.

Preheat oven to 375F. Cut squash in half lengthwise and scoop out seeds and pulp. Set seeds aside. Place squash flesh-side down on a baking pan and fill with 1/4 inch of water. Place foil overtop and bake for 40 – 50 minutes, until tender.

Brown turkey sausage in a pan. Once browned, remove from pan and slice. Return to pan to continue cooking. Chop onions and mushrooms and add to browned sausage. (If not using meat, heat a few tsps. of oil and sauté veggies in it.) Once vegetables are translucent, add cooked kamut and spinach and adjust seasonings to taste.

Remove squash halves from oven and fill  with vegetable and grain mixture. Sprinkle with parmesan cheese and bake for 15 minutes longer. Allow to cool slightly, and dig in!

20160308_110044(0)20160311_121331.jpg

20160311_122742

squash

baked squash seed ingredients:

  • rinsed squash seeds (I used seeds from 5 small squashes and ended up with approximately one cup of seeds; use whatever you have)
  • a few glugs of olive oil
  • 1/8 tsp. salt
  • 1/8 tsp. pepper
  • 1/2 tsp. cumin
  • 1/2 tsp. smoked paprika
  • 1/2 tsp. turmeric
  • 1/2 tsp. cayenne
  • 1/2 tsp. chilli powder

Preheat oven to 325F. Bring a pot of water to a boil and add seeds and salt. Boil for 10 minutes, remove, pat dry, and allow to cool. Put cooled seeds in a small bowl and coat with olive oil, spices, salt, and pepper. Line a baking sheet with parchment paper and sprinkles seeds over top. Bake for 30 minutes, stirring seeds every 10 minutes.

These make some heavily-seasoned seeds, so halve the amount of spices if you’d prefer a less spicy batch.

20160308_112137(0)

seeds

on giving gifts; painted spoons tutorial

Gifts can be a weird weird thing. When they feel mandatory, I’ve sometimes found it difficult to get inspired. Giving an unexpected gift, however, can be a lot more fun. I participated in a Secret Valentine gift exchange this year with a group of friends and wasn’t quite sure what to get the recipient, whom I adore, that a computer program had generated for me. Personally, I love nothing more than receiving a dozen home baked cookies, a hand-crafted ornament, or a thoughtful note. Here’s to hoping other people share this sentiment?

I think I first saw a tutorial for dip-dyed spoons on pinterest a few years ago — I used to really love pinterest — and thought that they’d make a sweet and simple gift. Fast-forward a number of years, and they are now in the hands of an excited owner! Here’s a quick how-to for making your own:

materials:

  • set of utensils (I found this bamboo set at TJ Maxx for $3.99)
  • one colored paint, one white paint (or maybe black? I didn’t consider going from light to dark — artists, would this work?)
  • dish to put paint in
  • paintbrush
  • painter’s tape
  • old cloth or wax/parchment paper

20160210_172236

20160210_172926

Lay out utensils on wax paper/cloth/job rejection letter that you want to defile, and wrap painters tape at roughly the same place on each. (If you want to paint different heights on each, wrap the tape in a way that makes that happen.) Paint the first utensil with either the base paint color, or adjust the starting color with white paint first. Continue painting each subsequent utensil, adding white paint to the existing color to lighten it between each utensil. Below, I’ve accidentally made the paint lighter than I wanted it, so I added more of the original color to darken. Gotta work with what you have.

20160210_173656

Continue lightening the color and painting each utensil until the entire set is complete. It may be helpful to prop the utensils up with some object so that they dry without sticking to whatever is underneath them. I strangely happened to have many rolls of tape laying around, so I used those. I allowed the paint to dry overnight, though I’m sure it was finished within a few hours. Viola!

20160211_091829(0)

on hobbies and busyness

20160213_083300

I’ve long dreaded being asked what my hobbies are, because, quite frankly, I’ve never had any. Up until recently, the only possible responses to the question I could have honestly given were watching tv, reading, and maybe running, if that were a thing I was actually doing. To excuse my lack of extracurriculars, I would use America’s favorite buzzword (phrase?) — I’m just so busy.

Don’t you hate it when people tell you how busy they are? It’s like, “No kidding! I’ve never met anyone with that particular problem before!” We are all busy. Of course, this phenomenon occurs to varying degrees, but vying for the title of ‘most busy person’ simply isn’t a contest I want to participate in.

I came to the conclusion that instead of lamenting to every curious inquisitor about how very booked my schedule was, maybe it was wiser (and more genuine) to say this instead: “These are what my priorities are, and aren’t.” Because isn’t that the truth? I know many people with what I would consider fully-booked schedules (and often children or other people they care for on top) who make time to train for a marathon, participate in a book club, or host a weekly dinner with friends. This assertion does not encompass all situations, but I think the argument can be made that what many of us do or don’t get done is more related to our priorities than to busyness. It is certainly the case in my own life.

A few years ago, I came upon this quote by Annie Dillard: “How we spend our days is, of course, how we spend our lives.” And I thought, well shoot! When you put it that way….. A professor of English and an author, she made this statement in reference to writing, but I think it applies broadly and generally to the whole of life. With this new and empowering/frightening information in hand, I was moved to take a look at my priorities. Did I want to spend my life tired and stressed and finishing a long day by binging on Grey’s Anatomy, a not even good show? No. I did not. To be clear, this is not a rant advocating that people don’t watch tv. If that feels enjoyable and empowering to you and is how you want to spend your life, please watch tv. That is 100% what you should do. For me, it has become a thing that absorbs precious hours that I’d prefer to use differently and I usually walk away from the activity feeling regretful and unmotivated. It is not how I personally want to spend my life. I no longer want it to be a priority.

While visiting family for Christmas, I stumbled upon an ad in my hometown newspaper about a beekeeping class that was to take place nearby in February. It was a day-long seminar (nine hours in total) and as soon as I saw the ad, I knew I had to do it. That was absolutely how I wanted to spend my life. It will be at least another year before I set up a hive, but it has been so fun having a new project to research and be excited about.

In addition to my new interest in beekeeping, I’m also taking a pottery class, writing this blog, and working on a number of other projects that are just about me and not related to monetary gain in any way. Notice that all of these activities require my thought, creativity and energy. It is logical to assume that tasks of this nature would leave a person feeling more tired and less energetic after the aforementioned long day which might have previously ended in a Grey’s Anatomy-induced stupor. However, I can attest to the fact that these activities have had the exact opposite effect; I feel more focused, more in tune to myself, more alive. Holy moly has this been liberating.

So, here’s to taking a hard look at our priorities and to remembering that how we spend our days is how we spend our lives. Spend wisely.


when life gives you lemons (and lavender and vodka)

I am in California this week for work, so another Californian (who is also one of my dearest dearest friends) has a recipe to share. This lady just made a big life change, moving thousands of miles from chilly Boston to the shores of the West Coast. I am so proud of her and the journey she is on. We got to spend the day together on Sunday and enjoyed a long walk, really tasty food, and lots of laughs. Here we are at the Palace of Fine Arts . (Has anyone else been here? Unbelievable that this thing is just hanging out in the middle of a bustling city.)

Without further ado, meet Isabel!

IMG_20160228_230002


When Alyssa first asked me to do a guest post, I was honored, yet understandably intimidated. Week after week I am impressed by the delicious and creative concoctions she comes up with, and always rapt by the personable and witty repartee that goes along with them. So, I’ve cleverly avoided the possibility of comparison and decided to stray from the beaten path of food! Food brings the party, but drinks make the party if you ask me.

I came upon this recipe in an ironically very Tuesday fashion. I recently made the move from the East to West coast, and have landed in beautiful San Francisco. Not only is it not 0 degrees right now (Hi East Coast friends! Come visit!), but the mild weather means fresh fruits and veggies are in abundance year round. When my new roommate casually informed me of the lemon tree growing in our back garden, I was beyond smitten. (Yes, I have a back garden in San Francisco. Yes, there is a lemon tree that is currently producing fresh lemons.) Upon further investigation, I learned that not only is there a lemon tree, but also a beautiful herb garden growing very happily alongside it. One of the largest plants in that garden is a lavender bush. Lavender has forever been one of my favorites, so it was time to get creative.

IMG_0356IMG_0351

Here was my challenge: What could I make that incorporates both lemons and lavender while letting each ingredient shine? A beautiful Saturday was coming up, and friends were coming over to enjoy the sunshine. The answer became obvious — vodka spiked lavender lemonade. This recipe is super simple, crazy delicious, and an instant crowd pleaser. Be forewarned…the drinkability of this can sneak up on you. Trust me.

simple syrup ingredients:

  • 6-10 sprigs of fresh lavender blossoms
  • 4-8 springs of fresh lavender leaves
  • 1 ¼ c. sugar (I recommend white if you want a clear syrup, but raw tastes great too)
  • 1 c. water

simple syrup directions:

Strip blossoms and leaves from the lavender sprigs and roughly chop. Simmer sugar, water, and lavender over medium heat until all sugar is dissolved. For a thicker syrup, add more sugar and simmer longer, but no need to go over 10 minutes. Take off of heat and let sit for 30 minutes. Strain out lavender and set aside, or bottle separately and add to all sorts of drinks you want to experiment with.

lemonade ingredients:

  • 4-5 ripe lemons (fresh from the tree if you’re lucky enough)
  • 4 c. ice
  • 5 c. water
  • ½ c. lavender simple syrup
  • your favorite vodka, to taste

Squeeze out all of the juice from the lemons making sure to scoop out any seeds. A little pulp adds a homemade touch; I kept mine. Keep one half of a lemon to slice thinly for garnish. Add water, lemon juice, ice, simple syrup, and vodka in a pitcher and stir. Add the sliced lemon to the pitcher or to individual cups. Pour over more ice and add a sprig of lavender. Add more simple syrup for a sweeter drink. (For those not into vodka or alcohol in general, this simple syrup is also deliscious in sparkling water.)

IMG_0363IMG_0371